
If you're a rural homeowner in the DFW area with well water, you've probably thought about installing an irrigation system. Maybe you're tired of dragging hoses across your acreage in Lucas or Heath. Or watching your water bill climb as your property in Wylie expands.
But here's the thing.
Well water doesn't work like city water. You can't just hook up a standard sprinkler system and expect it to run. Wells have limited flow rates, pressure that jumps around, and water quality issues that'll wreck an irrigation system designed for municipal water.
With the right setup though -- proper pump sizing, filtration, and zone design -- a well water irrigation system works beautifully. This guide walks you through everything you need to know, based on our experience installing and servicing well irrigation systems across the DFW Metroplex.
What you'll learn:
- How to calculate your well's true capacity and design zones accordingly
- Pump and pressure tank requirements for reliable operation
- Filtration systems that prevent clogging and extend system life
- Smart controller integration for 30-40% water savings
- Texas-specific considerations for clay soil and climate
Time needed: 15-20 minutes to read
Difficulty: Intermediate (DIY-friendly with professional guidance for complex installations)
- Never exceed 75% of your well's sustained GPM per irrigation zone
- A properly sized pressure tank prevents pump burnout and short-cycling
- Filtration is not optional -- sediment will destroy sprinkler heads and valves
- Smart controllers with pump relay support save 30-40% on water usage
- Zone delays of 5-10 minutes let your well recover between cycles
Understanding Your Well's Capacity
Before you design a single zone or buy any equipment, you need to know what your well can actually deliver. Not what your well driller claimed years ago. Current, real-world capacity.
GPM (gallons per minute) is the critical number. It tells you how much water your well can supply continuously without running dry. Most residential wells produce between 5-20 GPM, though this varies wildly depending on depth, water table, and aquifer characteristics.
But here's what most homeowners miss: your well's recovery rate matters just as much as its peak GPM. Maybe more.
A well might produce 15 GPM for the first 10 minutes, then drop to 5 GPM as the water level drops. Once you exhaust the standing water in the well casing, you're limited by how fast the aquifer can recharge.
We've seen rural properties in Heath and Lucas where homeowners assumed their "12 GPM well" could support a standard 4-zone system, only to find zones 3 and 4 barely functioned because the well couldn't maintain that flow rate. The initial flow test was accurate, sure. But it didn't account for sustained demand over a full irrigation cycle.
How to Test Your Well's True Capacity
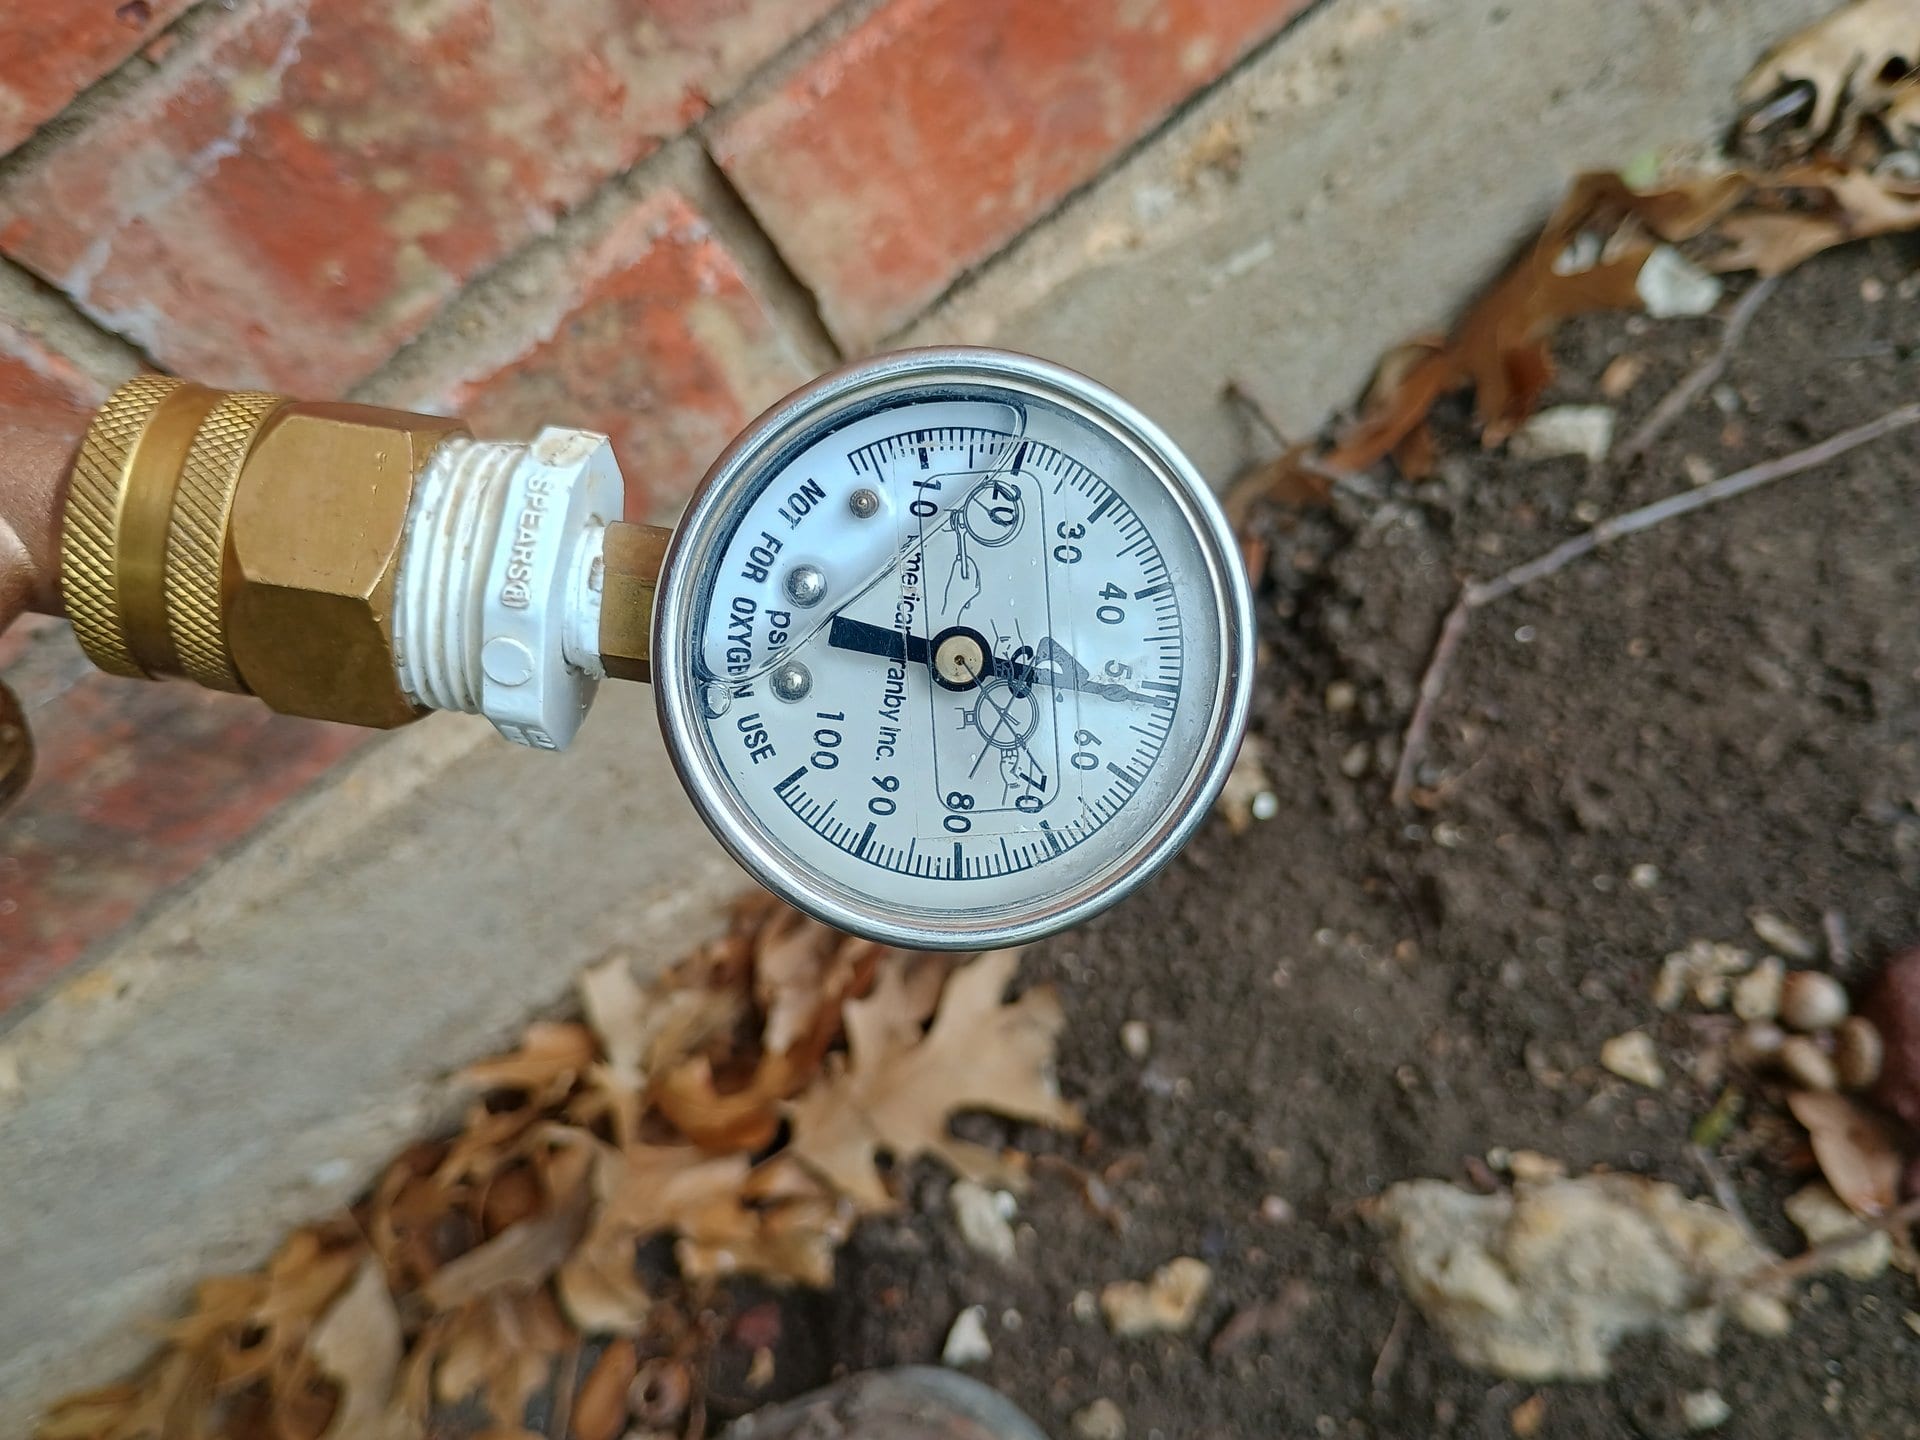
The bucket test gives you a rough estimate. Turn on an outdoor spigot connected to your well and time how long it takes to fill a 5-gallon bucket. If it takes 30 seconds, that's 10 GPM. Run the test for 15-20 minutes to see if flow rate drops.
Simple.
For a more accurate assessment, especially before investing in an irrigation system, have a well professional perform a flow test. They'll measure static water level, drawdown during pumping, and sustained flow rate. You'll learn not just your GPM, but how long you can maintain it.
North Texas water tables vary significantly. Properties in western Rockwall County might hit water at 200 feet, while areas near Lake Ray Hubbard can find it at 80 feet. Depth affects pump costs and long-term reliability.
The golden rule for irrigation design: Never use more than 75% of your well's sustained GPM for any single irrigation zone. You need that buffer for pressure maintenance and to prevent running your well dry mid-cycle. This 75% rule comes from decades of irrigation engineering experience and accounts for system inefficiencies, elevation changes, and friction loss in pipes.
Well Pump and Pressure Tank Fundamentals
Every well irrigation system needs a pressure tank.
Not optional. Not "nice to have." Essential.
Here's why: without a pressure tank, your pump cycles on and off every time a sprinkler head opens or closes. That's hundreds of starts and stops per irrigation cycle. Pumps aren't designed for that kind of cycling. They burn out fast, and well pump replacement costs run $1,500-$3,000 depending on depth.
How Pressure Tanks Work
A pressure tank stores water under pressure using an internal air bladder. When you turn on your sprinklers, the stored pressurized water supplies the system first. The pump only kicks on once the tank pressure drops below a set threshold (the "cut-in" pressure).
The air bladder separates the water from compressed air. As water fills the tank, the air compresses, creating pressure. When water flows out to your sprinklers, the compressed air expands, maintaining pressure without the pump running constantly. This simple mechanism prevents short-cycling -- the leading cause of premature pump failure in well systems.
Standard pressure switch settings are:
- 20/40 PSI - Pump starts at 20 PSI, stops at 40 PSI (common for shallow wells)
- 30/50 PSI - Pump starts at 30 PSI, stops at 50 PSI (most common residential setting)
- 40/60 PSI - Pump starts at 40 PSI, stops at 60 PSI (for wells with good production and higher pressure needs)
Most irrigation systems run fine at 40-60 PSI. If you're sharing the well with household use, your existing pressure tank setting likely works for irrigation too.
Sizing Your Pressure Tank
For irrigation systems, a larger tank reduces pump cycling. A 60-gallon pressure tank is typical for a property with 4-6 irrigation zones. Irrigating acreage with 8+ zones? Consider an 80-120 gallon tank.
The pressure tank sits between your well pump and the irrigation system. If you're using the same well for household and irrigation (common setup), the pressure tank serves both. Just verify your tank is sized for the combined demand.
From our experience serving rural properties across the DFW Metroplex, undersized pressure tanks are one of the most common design flaws we encounter. A homeowner will add an irrigation system to an existing well setup with a 30-gallon household tank, and the pump starts cycling excessively. Upgrading to a 60-80 gallon tank usually solves the problem and extends pump life by years.
Direct-Draw vs Pressure Tank Systems
Some large commercial systems use "direct-draw" setups where the irrigation controller triggers the well pump directly via a pump relay. This works, but only if you're running a dedicated irrigation well or if your household can tolerate pressure drops during watering cycles.
For residential properties sharing one well? Stick with a pressure tank system. It protects your pump and keeps pressure stable for indoor use while the lawn is watering.
Filtration Systems: Protecting Your Investment
Well water carries things city water doesn't: sediment, sand, silt, iron, manganese, and various minerals. Without filtration, those contaminants will clog your sprinkler heads, jam your valves, and reduce system lifespan by years.
Why Filtration Matters
The most common complaint from homeowners with well irrigation systems: constant clogging. Sprinkler heads that worked fine last month suddenly won't rotate. Pop-ups that barely clear the grass. Zones with weak coverage.
The problem? Sediment.
It gets stuck in the rotors before it even reaches the nozzle openings. You can clean the heads, but if you're not filtering at the source, you're just buying time until the next clog.
In North Texas, where many wells tap into sand and clay aquifers, sediment filtration isn't optional. It's the difference between a system that needs monthly maintenance and one that runs reliably for months between cleanings.
Install filtration after the pressure tank but before the irrigation valves. This protects your entire system while allowing the pressure tank to operate without flow restriction. For dual-use wells, you may need separate filtration for household and irrigation.
Types of Filtration Systems
Spin-Down Filters
These are the most cost-effective option for basic sediment removal. Water enters the filter housing tangentially, creating a spinning motion that forces heavier particles to the bottom collection chamber. Clean water passes through a stainless steel screen (typically 150-200 mesh, or about 75-100 microns).
Spin-down filters handle high flow rates and are easy to maintain. You simply open the bottom drain valve periodically to flush collected sediment. For light to moderate sediment, they work well.
Cartridge Filters
Disposable or cleanable cartridge filters offer finer filtration down to 5-20 microns. They're excellent for removing fine silt and clay particles common in North Texas well water. The downside: cartridges need regular replacement (every 1-3 months depending on water quality and usage).
In-line cartridge filters are inexpensive upfront but create ongoing costs. Budget typically $30-60 per year for replacement cartridges if you irrigate regularly.
Backwashing Filters
For properties with significant sediment, iron, or manganese, backwashing filters are the professional-grade solution. These systems use specialized filter media (like Terminox or manganese dioxide) that removes both particulate matter and dissolved minerals.
A backwashing filter automatically cleans itself by reversing water flow and flushing accumulated contaminants to drain. They're low-maintenance and highly effective, but cost more upfront ($800-2,500 depending on size and media type).
Multi-Stage Systems
Some rural properties need layered filtration -- maybe a spin-down for coarse sediment plus a cartridge for fine particles. Or a backwashing iron filter followed by a polishing filter. Water quality testing tells you what you actually need versus what's overkill.
Iron and Mineral Removal
If your well water has that characteristic rust color or leaves orange stains on concrete, you've got iron. Even clear water can contain dissolved iron that oxidizes on contact with air, creating staining and clogging issues.
Iron filters use oxidation and filtration to remove both ferrous (dissolved) and ferric (particulate) iron. Quality systems can handle up to 12 ppm iron and 5 ppm manganese. They're particularly valuable in rural North Texas areas where iron-rich groundwater is common.
The chemistry behind iron filtration: dissolved iron (Fe2+) is oxidized to particulate iron (Fe3+) through aeration or chemical oxidation. The oxidized iron then precipitates out and is trapped by the filter media. This two-stage process (oxidation + filtration) is why simple sediment filters don't solve iron problems -- you need a system specifically designed for iron removal.
Where to Install Your Filter
Install filtration after the pressure tank but before the irrigation controller and valves. This protects your entire irrigation system while allowing the pressure tank to do its job without additional flow restriction.
For dual-use wells (household + irrigation), you might need separate filtration for each system depending on your water quality and indoor water treatment setup.
Zone Design for Limited GPM
This is where well irrigation design gets mathematical. You're matching your irrigation system's demand to your well's finite supply. Get it wrong and you'll either run your well dry mid-cycle or create an underpowered system that takes all night to water.
Calculate Your Zone Demand
Every sprinkler head has a GPM rating based on its nozzle. Standard rotor heads typically use 2-4 GPM each. MP Rotator heads (often recommended for well systems) use 0.4-1.7 GPM. Spray heads use 1-4 GPM depending on nozzle and arc.
Add up the GPM for all heads in a zone. That's your zone demand. Compare it to 75% of your well's sustained GPM.
Let's say you have a 12 GPM well and want to use standard rotor heads averaging 3 GPM each. You can run 3 heads per zone (3 x 3 = 9 GPM). Need to cover 12 head locations? That's 4 zones.
Low-Flow Nozzles for Well Systems
Using low-flow nozzles lets you put more heads per zone, reducing the total number of zones and installation costs. MP Rotator nozzles from Hunter use 30-40% less water than standard rotors while providing comparable coverage.
With 1.5 GPM low-flow heads on a 12 GPM well, you could run 6 heads per zone instead of 3. That's the difference between a 4-zone and a 2-zone system for the same coverage area.
The tradeoff? Low-flow heads need to run longer to apply the same amount of water. Where a standard zone might run 20 minutes, a low-flow zone might need 30-35 minutes. But if your well can't support more GPM per zone, running longer is your only option.
We've designed dozens of well irrigation systems across rural DFW properties, and low-flow nozzles consistently provide the best balance between coverage and well capacity. The longer runtime is a small price to pay for reliable performance and reduced strain on your well.
Zone Sequencing and Recovery Time
Program your controller with delays between zones. This gives your well time to recover after each zone completes. A 5-10 minute delay between zones ensures the well refills enough for consistent pressure in the next cycle.
Without these delays, zone 1 might run strong, but by zone 4 you're seeing pressure drops and incomplete coverage. Your well needs breathing room. Think of it like interval training -- pushing hard, then recovering before the next push. Wells that get recovery time between zones maintain better long-term production than those run continuously.
Coverage Patterns for Rural Properties
On larger acreage, you might not need full-coverage irrigation everywhere. Prioritize zones:
- High-priority zones: Front lawn, landscape beds, areas visible from the house
- Medium-priority zones: Side yards, play areas
- Low-priority zones: Back acreage, pasture transitions
This lets you design an expandable system. Install high-priority zones now and add more zones later as budget allows or well production permits.
Storage Tank Systems: When to Use Them
If your well has good daily production but limited instantaneous flow rate, a storage tank system might make sense. The well fills the tank slowly throughout the day. The irrigation system draws from the tank during scheduled watering cycles.
Benefits of Storage Tanks
No pump cycling issues. The irrigation pump (if needed) draws from the tank, not directly from the well. The well pump operates independently on a float switch, only running when the tank level drops.
Higher flow capacity. Even a 6 GPM well can fill a 500-gallon tank overnight. During irrigation, you're drawing from stored water, so you can run higher GPM zones than the well could support directly.
Drought buffer. During dry periods when well recovery slows, the storage tank provides a reserve. You're not entirely at the mercy of real-time well production.
Power outage protection. With an elevated tank (gravity-fed system), you can irrigate even during power outages, assuming your controller has battery backup.
Tank Sizing Calculations
Estimate your total irrigation water needs per cycle. If you have 6 zones using 9 GPM each running 20 minutes, that's:
6 zones x 9 GPM x 20 minutes = 1,080 gallons per complete irrigation cycle
Add 20% buffer for evaporation and system inefficiency: 1,080 x 1.2 = 1,296 gallons
A 1,500-gallon storage tank would comfortably handle this system.
When Storage Tanks Make Sense
Consider a storage tank if:
- Your well produces less than 8 GPM sustained but recharges well over 12-24 hours
- You're irrigating large acreage (2+ acres)
- You experience frequent power outages
- You want a gravity-fed system with no pressure pumps
- You're in an area with declining water tables where future well production may decrease
Storage tanks generally add upfront cost ($1,200-4,000 depending on size and material) but solve fundamental flow limitation problems that can't be fixed with zone design alone.
Installation Considerations
Tanks can be above-ground or buried. Above-ground tanks (plastic or steel) are easier to maintain and inspect. Buried tanks save space but require more complex installation.
For gravity-fed systems, elevate the tank 20-30 feet above the irrigation area. Every foot of elevation provides about 0.43 PSI. A 30-foot elevation gives you roughly 13 PSI -- enough for drip systems or low-pressure sprinklers, but likely insufficient for standard rotor heads.
Most storage tank systems use a booster pump to pull from the tank and pressurize the irrigation system. The booster pump connects to the controller via a pump relay, just like a direct well connection would.
The best well irrigation system is one that matches your actual well capacity, addresses your specific water quality issues, and uses smart automation to maximize efficiency. It won't look like your neighbor's city water system, and that's fine. Built right, it'll serve your rural property reliably for years.
-- Brandon Surratt, Licensed IrrigatorSmart Controller Integration for Well Systems
Smart irrigation controllers save water by adjusting schedules based on weather, soil moisture, or evapotranspiration data. For well systems, those savings matter even more. You're managing a finite resource, and every gallon you don't waste is a gallon you don't have to pull from the ground. Adding flow monitoring to your smart controller gives you real-time visibility into exactly how much water each zone draws from your well.
How Smart Controllers Work with Wells
Most smart controllers support a "master valve" or "pump start relay" output. When the controller activates a zone, it simultaneously activates the relay, which starts the well pump or booster pump. When the zone shuts off, the relay cuts power to the pump.
This keeps the pump from running continuously. It only operates during active irrigation cycles.
Popular smart controllers compatible with well systems:
- Rachio 3 (8 or 16 zones, pump relay support, weather-based)
- Hunter Hydrawise (Pro-HC models, pump relay, cloud-based)
- Rain Bird ST8-2.0 (Simple operation, pump relay)
- Orbit B-hyve (Budget-friendly, weather integration)
All of these use weather data to skip watering when it's rained, adjust runtimes based on temperature and humidity, and let you control the system remotely via smartphone app.
Weather-Based vs Soil Moisture Controllers
Weather-based controllers (like Rachio) use local weather station data to calculate evapotranspiration (ET) -- how much water your lawn is losing to evaporation and plant transpiration. They adjust watering schedules automatically based on temperature, humidity, wind, and recent rainfall.
The science behind ET controllers: evapotranspiration combines two processes. Evaporation (water loss from soil and surfaces) and transpiration (water loss through plant leaves). By calculating daily ET rates and comparing them to applied water, the controller determines exactly how much irrigation is needed to maintain healthy turf without overwatering.
Soil moisture sensor controllers use buried probes that measure actual moisture content in the root zone. They only water when soil moisture drops below a threshold. This approach is highly accurate but requires proper sensor installation and occasional calibration.
For well systems in North Texas, weather-based controllers work well. They're easier to set up and maintain, and the weather data for the DFW area is reliable and hyperlocal.
Water Savings: What to Expect
Research from the Department of Energy and various controlled studies shows smart controllers save 30-50% water compared to traditional timer-based systems (DOE: Advanced Irrigation Controls).
For well systems, that translates to less strain on your well, lower electricity costs (running the pump less), and longer system lifespan. As certified Rachio Pro installers serving the DFW area, we've installed hundreds of smart controllers across rural properties in Lucas, Heath, Wylie, and surrounding areas. The water savings consistently hit 30-40%, and homeowners appreciate being able to monitor and control their irrigation remotely, especially during North Texas' unpredictable weather patterns.
Programming for Well Recovery
Use your controller's "delay between zones" feature. Most smart controllers let you set a delay of 1-30 minutes between zones. For well systems, 5-10 minutes is typical. This pause gives your well time to recharge between zones, maintaining consistent pressure and preventing the well from running dry.
Some controllers also support a "station pause" feature if a rain sensor or soil moisture sensor triggers mid-cycle. This is valuable for wells because it prevents the system from restarting immediately after a brief pause, giving the well extra recovery time.
Common Problems and How to Avoid Them
Let's talk about what goes wrong with well irrigation systems and how to prevent it. These insights come from years of diagnosing and repairing well systems across the DFW area.
Sediment Clogging
The Problem: Sprinkler heads stop rotating, spray patterns become weak or uneven, valves stick open or closed.
The Cause: Sand, silt, and clay particles in well water accumulate in moving parts. North Texas clay soil is notorious for fine particles that pass through basic screens but jam precision components.
The Solution: Install a quality spin-down or cartridge filter. Clean or flush the filter monthly during the irrigation season. Inspect sprinkler heads twice per season and clean any that show reduced performance. Consider upgrading to backwashing filtration if you're cleaning heads more than once per month.
Running the Well Dry
The Problem: Halfway through an irrigation cycle, pressure drops, coverage becomes spotty, or the pump starts running continuously without building pressure. (If your system isn't starting at all, see our guide on troubleshooting a sprinkler system that won't turn on.)
The Cause: Zone GPM demand exceeds the well's sustained flow rate, or zones run too close together without recovery time.
Why this happens: Many homeowners design zones based on peak GPM rather than sustained GPM. The well might handle 15 GPM for 5 minutes, but only 8 GPM for an hour. If you design zones for 15 GPM, the system works initially, then fails as the well level drops and flow decreases.
The Solution: Redesign zones to use less GPM (fewer heads per zone or lower-flow nozzles). Add 5-10 minute delays between zones. Consider a storage tank if well production is too limited for direct-draw irrigation.
Pump Cycling and Burnout
The Problem: The pump turns on and off rapidly (every 30-60 seconds) during irrigation. Over time, the pump fails prematurely.
The Cause: No pressure tank, or pressure tank is undersized or waterlogged (air bladder failed).
The Solution: Install an appropriately sized pressure tank (60-120 gallons for residential irrigation). Check pressure tank pre-charge annually -- it should be 2 PSI below the cut-in pressure. Replace the tank if the bladder has failed (you'll hear water sloshing inside or see rapid pump cycling even with a tank installed).
Iron Staining
The Problem: Orange or reddish-brown stains on driveways, sidewalks, house siding. Plants develop iron toxicity symptoms if iron levels are very high.
The Cause: Well water contains dissolved iron that oxidizes when exposed to air. Even low iron levels (2-3 ppm) can cause visible staining.
The Solution: Install an iron filter with oxidizing media. These systems remove both dissolved and particulate iron before it reaches sprinkler heads. For severe iron problems (above 8-10 ppm), consider a dedicated irrigation well or accept the staining as unavoidable.
Pressure Fluctuations
The Problem: Some zones have great pressure, others are weak. Coverage is inconsistent. Hard-to-predict performance.
The Cause: Undersized pressure tank, mixed head types pulling different GPM, elevation changes across zones, or partially clogged filters/valves.
The Solution: Verify pressure tank size matches system demand. Use consistent head types within each zone. For elevation changes, consider pressure-compensating nozzles or separate zones for high and low areas. Clean filters and check for valve debris.
Hard Water Buildup
The Problem: Over months or years, mineral deposits reduce flow through pipes, valves, and heads. Coverage gradually declines.
The Cause: Well water high in calcium and magnesium (hard water) leaves scale deposits, especially in areas where water evaporates (sprinkler nozzles, valve diaphragms).
The Solution: Periodic system flushing helps. For severe hard water, consider a water softener specifically for irrigation, though this adds cost and complexity. Often the most practical approach is budgeting for head and valve replacement every 5-7 years as part of normal maintenance.
Texas-Specific Considerations
Designing a well irrigation system in North Texas has unique challenges you won't find in other parts of the country. Our experience serving 15 cities across the DFW Metroplex has taught us what works (and what doesn't) in this climate.
DFW Clay Soil
Our heavy clay soil has poor drainage and compacts easily. When you irrigate on clay, water penetrates slowly. If you apply water faster than the soil can absorb it, you get runoff -- wasted water and potential erosion.
The solution: cycle-and-soak programming. Instead of running one zone for 30 continuous minutes, split it into two 15-minute cycles with a 30-60 minute soak period between. The first cycle wets the surface, the soak period lets water penetrate, and the second cycle adds the rest of the needed water. This prevents runoff and improves deep root development.
Most smart controllers support cycle-and-soak programming. It's especially valuable on slopes and compacted areas. We recommend it for nearly every well irrigation system we install in the DFW area -- the difference in water efficiency and turf health is substantial. For a deep dive on working with clay soil, see our clay soil irrigation design guide.
Summer Heat and Increased Demand
North Texas summers are brutal. July and August routinely hit 100°F+, and evapotranspiration rates skyrocket. Your well will work harder during peak summer months than any other time of year.
Monitor your well's water level during summer. If you notice declining pressure or longer recovery times, reduce irrigation frequency or zone runtimes temporarily. Overworking a well during drought periods can damage the aquifer and reduce long-term production.
Consider supplemental watering only for high-value landscape beds during peak heat. Let the lawn go dormant if necessary. Bermuda and Zoysia grasses (common in North Texas) handle summer dormancy well and recover quickly when watering resumes.
Winterization for Rural Well Systems
Municipal irrigation systems need winterization to prevent freeze damage. Well systems need it even more.
Your well pump, pressure tank, and any exposed piping are vulnerable to freezing. While North Texas freezes are rare and brief, they happen. The February 2021 freeze caused extensive damage to unprepared systems across the region.
Winterization steps for well irrigation:
- Shut off power to the irrigation controller and pump relay
- Drain the pressure tank (or protect it in a heated space)
- Blow out all irrigation lines with compressed air (50-80 PSI)
- Drain or blow out the backflow preventer and any above-ground piping
- Insulate the well head and any exposed piping if temperatures below 20°F are forecast
If you're in an area that freezes regularly (northern Collin County, western Rockwall County), consider burying your pressure tank below the frost line or housing it in an insulated enclosure.
Water Table Depth in North Texas
Water tables across the DFW Metroplex vary from 50 feet to 300+ feet depending on location. Eastern areas near lakes often have shallow water tables. Western and northern areas typically require deeper wells.
Deeper wells mean:
- Higher upfront drilling costs (typically $15-30 per foot)
- More powerful pumps required (higher electricity costs)
- Potential for lower water quality (more minerals, harder water)
- Longer recovery times if aquifer recharge is slow
If you're on a rural property without an existing well, talk to local well drillers about typical depths and production rates in your specific area before committing to an irrigation system. A site-specific well assessment prevents expensive surprises.
Local Well Regulations
Some municipalities in the DFW area have regulations around well usage, irrigation restrictions during droughts, or requirements for separate irrigation wells vs domestic wells. Most rural areas have fewer restrictions, but it's worth checking with your county or local groundwater conservation district.
The Trinity Glen Rose Aquifer (which supplies much of North Texas) is monitored by the North Texas Groundwater Conservation District. While residential well users rarely face restrictions, staying informed about aquifer levels and conservation recommendations is smart long-term planning.
Frequently Asked Questions
Can I use my existing household well for irrigation?
Yes, most residential wells can serve both household and irrigation needs with proper sizing. The key is ensuring your pressure tank is large enough for the combined demand (typically 60-120 gallons for irrigation), and that your well's sustained GPM can handle both uses. Design irrigation zones to use no more than 75% of your well's sustained GPM, and program watering during off-peak household usage times (early morning).
How much does a well water irrigation system cost to install?
For a rural DFW property, expect $3,500-8,000 for a complete well irrigation system covering 0.5-1 acre. This includes zone installation, smart controller, pressure tank upgrade if needed, and basic filtration. Costs increase for larger acreage, complex filtration (iron removal), storage tank systems, or properties requiring extensive trenching. The investment typically pays for itself in 3-5 years through water savings and increased property value. For ongoing maintenance costs, our sprinkler repair cost guide covers common repair pricing.
Do I need a separate well for irrigation?
Not usually. Most residential wells in North Texas can handle combined household and irrigation demand with proper system design. A separate irrigation well makes sense only if your existing well has very limited GPM (under 5 GPM sustained), you're irrigating large acreage (5+ acres), or local regulations require it. For most rural homeowners, upgrading the pressure tank and designing efficient zones is more cost-effective than drilling a second well.
Will well water damage my lawn or plants?
Well water quality varies, but most North Texas wells are suitable for irrigation. High iron content can cause cosmetic staining but rarely harms plants. Hard water (high calcium/magnesium) is actually beneficial for turf. The main concerns are high sodium levels (rare in our area) or extreme pH. Get a basic water quality test ($50-100) to identify any issues. Most problems are solved with proper filtration rather than avoiding well water irrigation.
How often should I clean my well irrigation filter?
Spin-down filters: flush weekly during active irrigation season (April-October). Cartridge filters: inspect monthly, replace every 1-3 months depending on sediment levels. Backwashing filters: set to auto-backwash weekly or based on pressure differential. After heavy rains or well work, inspect filters immediately -- sediment levels can spike. If you're cleaning sprinkler heads more than twice per season, upgrade your filtration system.
When to Call a Professional
Some aspects of well irrigation design are straightforward DIY projects. Others benefit from professional experience, especially in rural North Texas where well characteristics vary widely.
You Can Probably Handle
- Basic GPM testing (bucket method)
- Choosing a smart controller and programming it
- Installing a simple spin-down filter
- Adjusting sprinkler heads for coverage
- Routine maintenance (filter cleaning, head adjustments)
Consider Professional Help For
Complex well assessment. Professional flow testing measures sustained GPM, drawdown, and recovery rates accurately. This data prevents costly design mistakes. It's especially valuable before installing a large system or if you suspect your well has declining production.
Pump and pressure tank selection. Matching pump horsepower, pressure tank size, and pressure switch settings to your specific well depth, desired PSI, and irrigation demand requires experience. Get it wrong and you'll either have inadequate pressure or waste electricity. Our team has sized pump and tank combinations for hundreds of DFW wells, and we've learned that the manufacturer's sizing charts don't always account for Texas-specific factors like clay soil backpressure and summer heat loads on pumps.
Electrical work. Wiring a pump relay to your controller and well pump involves 120V or 240V wiring. If you're not comfortable with electrical work, hire a licensed electrician or irrigation professional. Improper wiring can damage equipment or create safety hazards.
Filtration system selection. A water quality test reveals iron, manganese, hardness, pH, and sediment levels. Based on those results, a professional can recommend the right filtration approach -- whether that's a simple sediment filter or a comprehensive backwashing iron removal system. We've seen homeowners spend $1,500 on the wrong filtration system because they didn't test their water first.
Multi-well or booster pump systems. Large rural properties sometimes use multiple wells or booster pumps to serve different irrigation zones. These systems require careful hydraulic design and valve coordination.
If you're uncertain about your well's capacity, dealing with complex zoning for acreage, or need to integrate filtration and smart automation, our team at Better Earth Solutions can evaluate your well system and design an efficient irrigation setup. We work with well systems regularly across rural DFW properties and understand the unique challenges of Texas clay soil and water quality. Call us at (469) 839-2113 or book online for a consultation.
Getting Started
Building a well irrigation system takes more planning than a city water system, but it's absolutely doable. Here's your action plan:
Step 1: Test your well's capacity. Run a sustained flow test (either DIY bucket method or professional assessment) to know your true GPM and recovery rate.
Step 2: Get a water quality test. Know what you're dealing with -- iron, hardness, sediment levels. This determines your filtration needs.
Step 3: Map your property and calculate coverage needs. Measure the areas you want to irrigate. Determine head placement and count the total heads needed.
Step 4: Design your zones. Based on well GPM and head requirements, calculate how many zones you need. Don't exceed 75% of sustained GPM per zone.
Step 5: Choose your filtration. Match filter type to your water quality test results. Budget for this upfront -- it's not optional.
Step 6: Select a smart controller with pump relay support. This saves water and automates the heavy lifting of scheduling and weather adjustments.
Step 7: Install in phases if needed. Start with high-priority zones (front yard, landscape beds) and expand over time as budget allows.
This information is provided for educational purposes. Some irrigation installations require specialized equipment or knowledge of local regulations and well characteristics. If you're unsure about any aspect of well irrigation design, contact a licensed irrigation professional familiar with rural North Texas properties.
Better Earth Solutions serves the DFW Metroplex including Garland, Plano, Richardson, Rowlett, Wylie, Murphy, Allen, Dallas, Rockwall, Heath, Lucas, Lake Highlands, Casa View, Preston Hollow, and Willow Bend. For professional irrigation repair, installation, or smart controller setup, call (469) 839-2113 or book online.